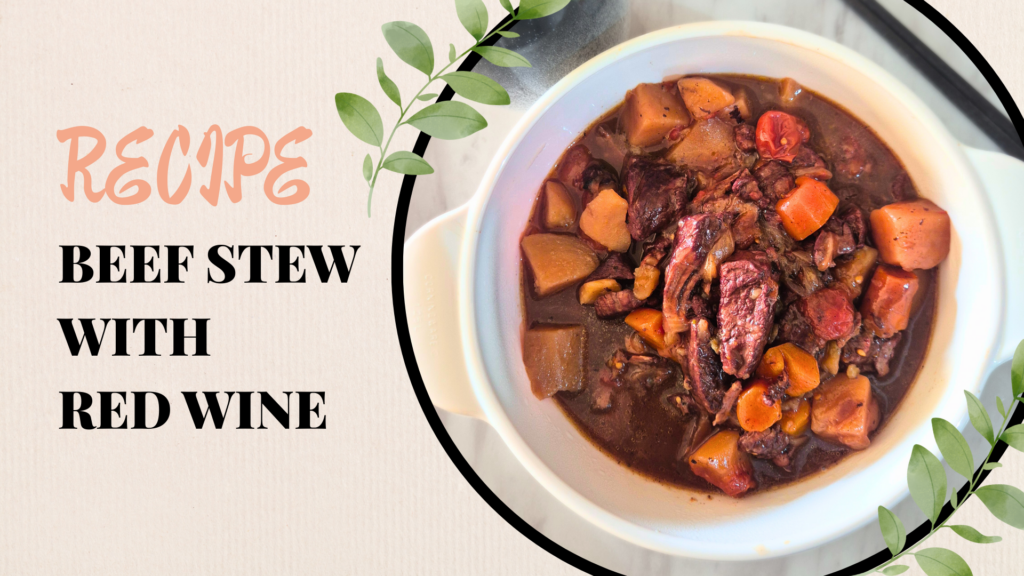
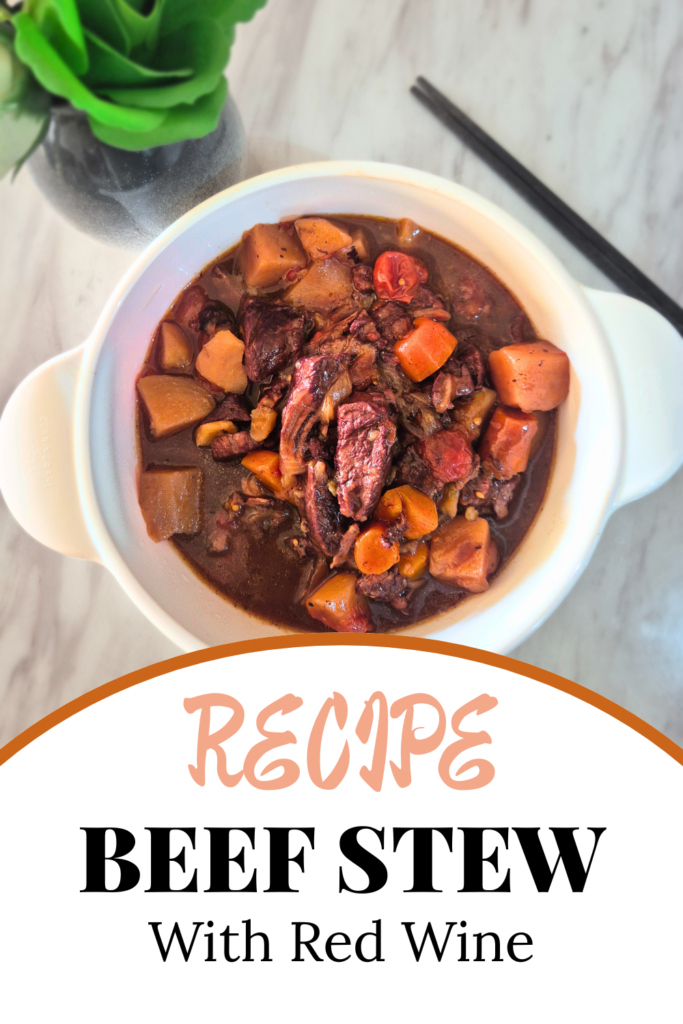
Looking for something warm, hearty and easy to make in one pot? Then you must try this beef stew with red wine recipe.
Estimated read: 4 minutes
The weather has been slightly chilly lately, so I felt like cooking something warm and easy to put together.
This Beef Stew with Red Wine recipe, made in a pressure cooker, gives you tender beef and a rich, savoury gravy. All without standing over the stove for hours. It is simple, practical and comforting.
If you want to try cooking something that feels a little more thoughtful but is still practical for a weekday, try this beef stew with red wine recipe.
Here’s How to Cook Beef Stew with Red Wine
This traditional beef stew with red wine is a complete meal made in just one pot. Okay, maybe two (a rice cooker) since I love to pair it with steaming rice.
Prep Time: 30 minutes
Cook Time: 1 hour 30 minutes
Total Time: 2 hours
Ingredients:
This is only an estimate, as I tend to cook by eye-power and feeling – also known as using a bit of ‘agaration’.
- 1kg boneless beef chuck, cut into 1.5inch pieces
- A pinch of salt
- A pinch of ground black pepper
- Olive oil
- 1 yellow onion, sliced into thin wedges
- A handful of peeled and smashed garlic
- 1 tablespoon balsamic vinegar
- ¼ cup all-purpose flour
- 2 cups red wine (preferably dry red wine like Merlot or Pinot Noir)
- 1 cube of beef stock
- 2 cups water
- Some herbs (pair with any herbs that you like, typically thyme)
- A bunch of cherry tomatoes
- 5 carrots, peeled and cut into reasonable chunks
- 3 potatoes, peeled and cut into reasonable chunks
- Corn starch
Instructions:
- Pat the beef dry and season it with salt and pepper. Set it aside for about 15 minutes.
- In a pressure cooker such as Ninja Foodi 11 in 1, add some olive oil. Then select Sear/Sauté and heat it over medium heat.
- Once heated, sear the beef chunk in batches. Let the meat develop a nice brown crust, then turn it with tongs. (TIP: Avoid overcrowding the pot, as this can cause the meat to steam instead of sear.)
- Transfer the meat to a plate and set aside.
- Add more olive oil to the pot and heat it over medium heat.
- Once heated, add the onions, sliced into thin wedges. Cook until soft, browned and caramelised.
- If the fond (i.e. the flavourful browned bits in the pot) is still stuck, add 1 tablespoon of balsamic vinegar. The acidity from the balsamic vinegar will help lift the fond (i.e. the flavourful, browned bits on the pot) and balance the richness of the stew.
- Add the garlic and fry for about one minute.
- Add in the vegetables – cherry tomatoes, carrots and potatoes. Cook for about 2 to 3 minutes, stirring constantly to prevent burning.
- Add ¼ cup of plain flour (all-purpose flour) and stir well to coat everything evenly. The flour will help thicken the broth, turning it to a rich sauce that clings to the meat and vegetable.
- Pour in 2 cups of red wine and 2 cups of water. Add one cube of beef stock and the herbs. (TIP: As this is a pressure-cooked dish where liquid does not evaporate as much as in stove cooking, add just enough water to cover the meat.)
- Cover the pressure cooker. Change the setting to ‘Pressure’ and set the cooking time to 1 hour.
- After cooking, allow the pressure to release naturally for 15 minutes, then turn the valve to ‘Vent’ to release any remaining pressure. (TIP: Place a wet cloth over the vent and use a chopstick to turn the knob. This helps reduce hot steam and the risk of scalding. It is also fine to allow the pressure to release naturally on its own. This is practical if you are preparing the stew before work and leaving it to finish cooking while you are out.)
- Open the lid once all the pressure has been released.
- Change the setting to ‘Sear/Sauté’ over medium-high heat. Stir in some cornflur slurry and thicken the broth to your preferred consistency.
- Serve warm.
The stew improves in flavour if made at least one day ahead. If refrigerating, allow the beef stew to cool to room temperature first.
Note: Some of the links in this post are affiliate links, which means I may earn a small commission if you decide to make a purchase. There is no additional cost to you. It helps support this blog and allows me to continue creating helpful content. Thank you for supporting my work.